A cable lasher is one of the most crucial pieces of hardware fiber lineman use to get their job done. The basics of how to use a cable lasher are quite simple, but can get much more complicated when a bolt or gear gets out of whack. In this article we are going to discuss how fiber lineman use a cable lasher, the purpose it serves, and how much it sucks to lift a lasher by hand from the ground to the strand on hooks 🙂
Buzzlineman is reader supported. If you purchase after clicking the affiliate links, I’ll earn some money- maybe even enough to buy me a new pair of work gloves. You do not pay a higher price.
I should also note that there are more ways than what I will describe on how to swap a lasher. I have done it multiple ways and I have seen other lineman do it different ways. Below is what works best for me.
What does a Cable Lasher do?
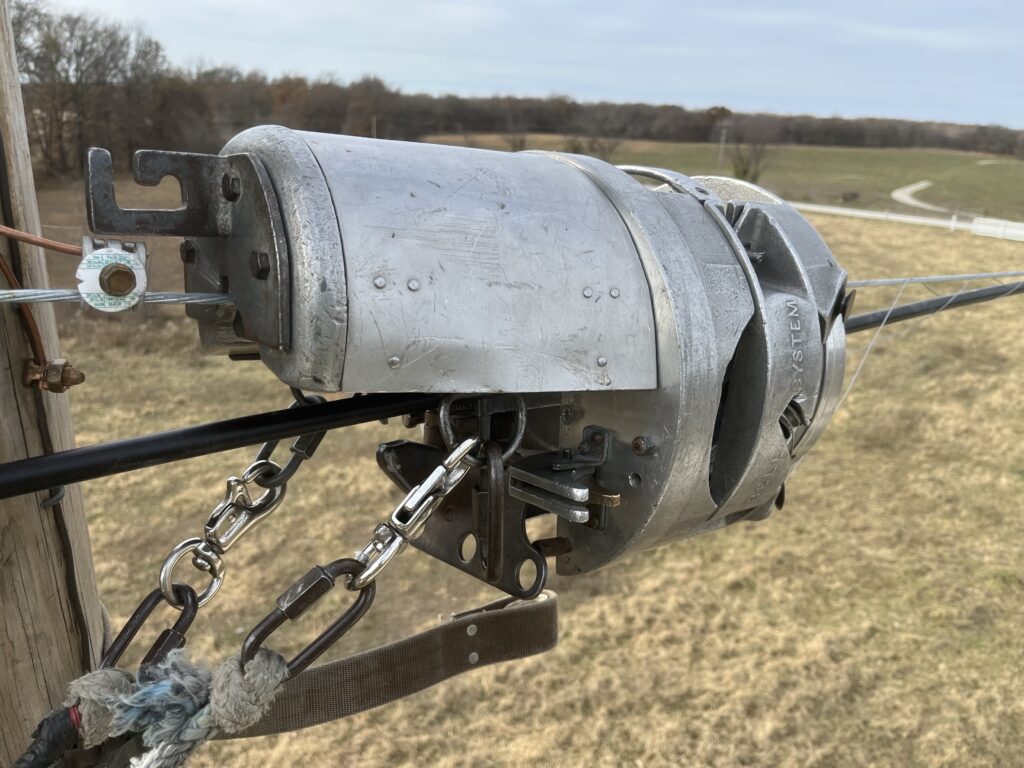
A cable lasher has 1 primary purpose- attach stainless steel wire to the fiber/cable and support strand to keep the cable tight in the air. As the lasher spins it releases wire from the drum that wraps around the fiber and strand. As long as the lasher continues forward it will keep the wire, fiber, and strand all bound together tight.
How Fiber Lineman use a Cable Lasher
Fiber lineman are responsible for swapping the lasher from one side of the pole to the other. Multiple steps and materials take place from start to finish in order for the lasher to get to the other side of the pole. Let’s go over the 10 step detailed breakdown of how this all happens.
1. Carabiner (Optional)
The carabiner is completely optional, but I like to use it so the fiber has less downward pressure. Attach the carabiner to the opposite side of the pole so it supports as much fiber as possible, but not too far as it will be in the way of the lasher when you swap it. After you swap the lasher remove the carabiner.

2. Move bridle to front side
Take the bridal snap from the back side and move it to the front, this allows the fiber to fall from the front gate (optional carabiner help here). Depending on the type of bridal you use will dictate where you place your snap from the backside. We use these steel quick connectors that connect to the snaps you see in the picture below, I usually put the backside snap on that front side quick connector until I have the lasher swapped.

3. Open the front gate
The front gate supports the fiber, similar to the carabiner, but it makes sure it stays in place by not allowing it to fall out of the bottom of the lasher. Opening the front gate is a important step in the process to allowing the lineman to swap the lasher freely.

A couple thoughts on front gates- most work as intended. However, over time, things tend to breakdown and not work as well as they use to. I say this because some of the lashers I have used the front gate can be finicky and not want to stay open when you’re swapping the lasher. This can be frustrating and dictate how you place your hands when picking it up.
4. Open the back gate
The process is similar to the front gate, but for the back gate it’s often going to be a button-like trigger to push to release the back gate, instead of the latch like trigger on the front gate. The back gate’s job changes depending on what is going on such as putting up a sno-shoe, overlash, or single lash 12 count. Sometimes you’ll have multiple cables above the back gate, sometimes you’ll have 0 above and only 1 below (most common for us rural fiber guys).
Opening the back gate allows the lineman to freely pick the lasher up off the line (strand).
So push the button that releases the back gate and make sure the gate pops wide open and stays open! Move on to step 5.


5. Spin Lasher to Open Completely
Now you have both gates open so it’s time to let that fiber loose. Spin the back of the lasher counter clockwise until it opens and drops the fiber. Try not to let the lasher go backwards as this will create slack in your wire. We don’t like loose lines, keep that wire tight.

6. Grab lasher and swap to the other side of the pole
Alright so here is the tricky, tough, and worrisome part of the job. It’s time to swap the lasher from one side of the pole/clamp to the other side of it. Obviously you can’t push, slide, or spin the lasher to the other side, because the clamp is in the way. So the lineman is going to need to pick the lasher up and set it down on the other side of the clamp.
While doing this you have to make sure you keep both the front and back gate open. I say this because I have used a lot of lashers where the front and/or back gates didn’t work properly. It can be a real pain trying to swap this big heavy sucker while making sure the gates don’t close on you. If you do have front or back gates that don’t want to behave, pay attention to your angles and remember one constant motion is best.
After you safely get your lasher swapped it’s time to redo your gates, bridal and fiber. What works best for me is to first remove my carabiner, put my fiber back in the lasher, close the front gate, close the back gate and then do up my bridal by securing the back snap of the bridal.
7. Attach bug nut on incoming side of the pole
Now you need to attach your bug nut on the same side of the pole that the lasher came in on. I use a 7/16 ratcheting wrench to attach my bug nuts. Spec books change from project to project, but to get my bug nut measurement I go 2 wrench lengths from the edge of the clamp and tighten it TOWARDS the pole. Or for a preformed frame I install directly at the end of the preform.
The bug nut has a cut out groove that matches the strand, make sure you align that before tightening it down. There will also be 2 washers that you need to make sure are loose enough for you to get the wire between them.

Again, to attach the bug nut make sure you do the following:
- 2 wrench length out
- align the grooves that fit the strand
- tighten towards the pole
- loosen the washer nut for wire
8. Cut, wrap, secure wire to bug nut
Another really important step in the process, cut the wire. Starting at the back of the lasher, cut the wire flush with that side of the pole. This should give you more than enough wire to easily wrap and secure the fiber.
After you cut the wire you will need to wrap it 3 times on the strand only, following the same spacing. Then go under the washer, above and then around the front of the bug nut. You’ll then wrap the wire around the bolt 3 times completely.
Take the wire around the back and shove it through the bug nut so the tail end comes out the other side above the wire. Pull it all tight and cut it flush. Now you can tighten down the nut on the washer side, just snug it up.

9. Attach 2nd bug nut
This is pretty much the same process as the step prior. One thing to note is you will probably need to PUSH the lasher out a bit further so you have room to place the bug nut and allow for the correct spacing for wrapping the wire. After that install your bug nut at the correct length and then wrap your wire just like before. After you have the wire wrapped around the strand and bug nut you are ready to send that lasher to the next pole. Congrats!
10. On Hooks
Now that you know how to swap a lasher it’s time to get familiar with setting up the lasher when the bucket truck isn’t able to get to the pole. There are a few different ways you can do this- the beast hoss way or the smart way. Beast hoss method is attach the lasher rope to the lasher and hand pull it all the way up to you once you get to your working position. The smart way is to attach a 750 roller to the strand and put your rope on the 750 and have the groundhand pull, using the 750 roller as a pulley system. Your choice.
Final Thoughts
Swapping the lasher is one of the most frequent aspects of the job and being able to do it efficiently and quickly can really add some $$$ to your pocket, at least for us contractors. Ideally a crew has a couple lineman that are really good at swapping the lasher, so the lasher is rarely at a pole without it getting swapped. What matters most when learning how to use a cable lasher is hands on experience and getting comfortable with the lasher your crew uses most.
That’s pretty much how fiber lineman use a cable lasher in 10 steps, some more simple than others. If you are looking for a new drill for installing the strand for the fiber and lasher, check out this article where we talk about 5 of the best impact drills for fiber lineman.